How to make a mold for casting?
Making a mold for casting involves several steps, which can vary depending on the type of casting process (e.g., sand casting, die casting, investment casting) you intend to use. Here’s a general overview of the process for creating a mold:
1. Design the Mold
– Create a Design: Use CAD software to create a detailed design of the part you want to cast, including all necessary dimensions and tolerances.
– Consider Features: Include features like draft angles, vents, and cores, which facilitate mold release and ensure proper filling.
2. Select Mold Material
– Choose an appropriate material for the mold based on the casting method. Common materials include metal (for permanent molds), sand (for sand casting), or resin (for investment casting).
3. Prepare the Pattern
– Make a Pattern: Create a pattern of the object to be cast, typically from wood, plastic, or metal.
– Ensure Accuracy: The pattern should be slightly larger than the final product to account for shrinkage during cooling.
4. Mold Making Process
For Sand Casting:
1. Pack Sand: Place the pattern in a mold box and pack sand around it to form one half of the mold.
2. Add Binder: If using a bonded sand mix, ensure it’s packed tightly.
3. Remove Pattern: Carefully remove the pattern from the sand, leaving a cavity.
4. Create the Other Half: Repeat the process for the other half of the mold, making sure to align them properly.
For Die Casting:
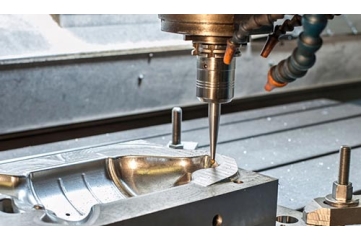
1. Machining: If using metal molds, machine the mold halves using CNC machines based on your CAD design.
2. Assembly: Align and fit the two halves of the metal mold together, ensuring they seal properly to prevent leakage.
For Investment Casting:
1. Make a Wax Pattern: Create a wax pattern of the part.
2. Coat with Ceramic: Dip the wax pattern in a ceramic slurry and allow it to harden.
3. Remove Wax: Heat the mold to remove the wax, leaving a cavity for the molten metal.
5. Finishing the Mold
– Clean and Polish: Ensure the mold surfaces are smooth and clean to achieve a good finish on the cast part.
– Add Vents and Gates: For effective metal flow and gas escape, add gates for pouring and vents for air.
6. Test the Mold
– Perform a trial run with lower-cost materials to check for any defects in the mold design or the casting process.
7. Final Adjustments
– Make necessary adjustments based on the test results to improve the mold design.
8. Production
– Once satisfied, proceed with the production casting using the completed mold.
Each casting method has specific requirements and techniques, so it’s essential to adapt these steps accordingly to ensure successful mold creation.


